
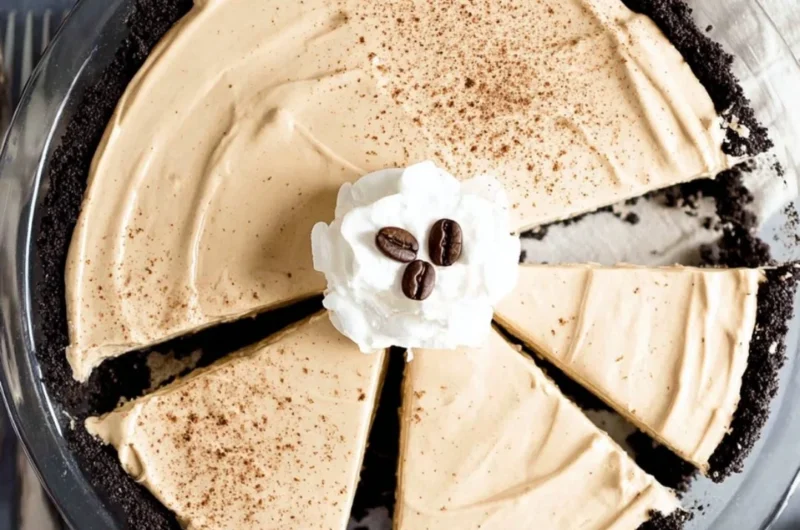
Cozy No-Bake Coffee Pie: A Sweet Indulgence
There’s something so comforting about a rich, creamy dessert that brings back warm memories of family gatherings and sweet, laughter-filled afternoons. This No-Bake Coffee Pie feels like a cozy hug on a plate, infused with the soothing aroma of espresso that lingers like fond memories. I can still recall my grandmother making coffee-flavored treats for us as kids, always reminding us to savor every last bite. If you’re looking for a refreshing yet indulgent treat that’s perfect for any season, look no further! This easy, no-bake dessert is the ultimate creamy fall dessert that will win over your friends and family. Trust me; this is one you’ll definitely want to pin for later!
Why You’ll Love This Recipe
- No-Bake Delight: This No-Bake Coffee Pie comes together without the need for an oven, making it a breeze to prepare on a busy day.
- Crowd-Pleasing Flavor: The combination of espresso and creamy filling offers the perfect balance of sweet and rich, a guaranteed favorite.
- Quick Preparation: With just a few simple steps, you’ll have a decadent dessert ready to go in no time.
- Family-Friendly Treat: This pie is a great way to introduce kids to the wonderful world of coffee flavors (just adjust the espresso for the younger ones!).
- Versatile Dessert: Ideal for any occasion — be it a summer party or a cozy winter gathering, it fits in perfectly.
What You’ll Need
Gather These Simple Ingredients:
- 1 cup espresso powder
- 1 can sweetened condensed milk
- 2 cups heavy cream
- 1 package Oreo cookies (for crust)
- 1/4 cup unsalted butter (melted)
- 1/2 tsp vanilla extract
How to Make No-Bake Coffee Pie
Let’s Make It Together:
- Create the Crust: Begin by crushing the Oreo cookies into fine crumbs and mixing them with the melted butter. Press the mixture into the bottom of a pie pan to form a lovely, crispy crust.
- Whip the Cream: In a large mixing bowl, beat the heavy cream until soft peaks form. This fluffy whipped cream will be the secret to your pie’s light texture.
- Mix Espresso and Milk: In another bowl, combine the espresso powder with the sweetened condensed milk until you have a smooth, creamy mixture that beckons for a taste.
- Fold It Together: Gently fold the whipped cream into the espresso mixture. Take your time here; you want to keep that light, airy texture while fully combining the flavors.
- Pour and Spread: Pour the luscious filling into your prepared Oreo crust, smoothing the top for that perfect finish.
- Chill the Pie: Freeze your pie for at least 4 hours or until firm. This step is essential for achieving that wonderful texture!
- Serve and Enjoy: Once the pie is chilled, slice it up and enjoy every creamy, dreamy bite!
Delicious Variations to Try
While this No-Bake Coffee Pie is perfect as is, here are a few creative twists you might consider:
- Chocolate Drizzle: After freezing, drizzle some melted chocolate over the top for an indulgent touch.
- Nutty Crunch: Add crushed nuts like hazelnuts or almonds to the filling for a delightful, crunchy texture.
- Spiced Delight: Mix a pinch of cinnamon or nutmeg into the espresso layer for a warming fall twist.
- Alternative Crusts: Try using graham crackers or a pecan crust for a different flavor balance that still complements the creamy filling.
Chef Emma’s Helpful Tips
- Make-Ahead Delight: This pie can be made a day in advance, making it a perfect time-saver for entertaining or busy weeknights.
- Ingredient Swaps: If you want a less sweet pie, consider reducing the amount of condensed milk or using a sugar-free alternative.
- Serving Tips: For the prettiest slices, use a warm knife to cut through the pie — it will glide right through those creamy layers!
- Leftover Storage: If you have any leftovers (though I doubt you will!), keep them covered in the refrigerator for up to 3 days.
What’s Inside – Nutrition Breakdown
- Serving Size: 1 slice
- Calories: 320
- Total Fat: 20g
- Saturated Fat: 10g
- Carbohydrates: 32g
- Sugar: 20g
- Protein: 4g
- Sodium: 150mg
Frequently Asked Questions
Can I make this ahead?
Absolutely! This No-Bake Coffee Pie can be made a day in advance and kept in the freezer until ready to serve.
Can I use different ingredients?
Yes! Feel free to experiment with different flavors of cookies for the crust or even swap out the espresso powder for other flavors like matcha or chocolate.
How do I store leftovers?
Keep any leftovers covered in the refrigerator for up to 3 days, or freeze them for a longer-lasting treat.
How long does it last?
If properly stored, this pie can last in the freezer for up to 1 month!
A Cozy Closing Note
This No-Bake Coffee Pie is more than just a dessert; it’s a warm reminder of simpler times shared over sweet delights. Every bite is a tender embrace, rich in flavor and memories. So why not save this No-Bake Coffee Pie to your cozy treats board? You’ll be ready for that dessert craving when it strikes! Enjoy creating and indulging in this slice of comfort. Happy baking!
Cozy No-Bake Coffee Pie
- Total Time: 255 minutes
- Yield: 8 servings 1x
- Diet: Vegetarian
Description
A creamy, no-bake dessert infused with espresso, perfect for any occasion. This pie offers a delightful balance of sweet and rich flavors that bring back warm memories.
Ingredients
- 1 cup espresso powder
- 1 can sweetened condensed milk
- 2 cups heavy cream
- 1 package Oreo cookies (for crust)
- 1/4 cup unsalted butter (melted)
- 1/2 tsp vanilla extract
Instructions
- Create the crust: Begin by crushing the Oreo cookies into fine crumbs and mixing them with the melted butter. Press the mixture into the bottom of a pie pan to form a lovely, crispy crust.
- Whip the cream: In a large mixing bowl, beat the heavy cream until soft peaks form. This fluffy whipped cream will be the secret to your pie’s light texture.
- Mix espresso and milk: In another bowl, combine the espresso powder with the sweetened condensed milk until you have a smooth, creamy mixture that beckons for a taste.
- Fold it together: Gently fold the whipped cream into the espresso mixture, keeping that light, airy texture.
- Pour and spread: Pour the luscious filling into your prepared Oreo crust, smoothing the top for that perfect finish.
- Chill the pie: Freeze your pie for at least 240 minutes or until firm. This step is essential for achieving that wonderful texture!
- Serve and enjoy: Once the pie is chilled, slice it up and enjoy every creamy, dreamy bite!
Notes
This pie can be made a day in advance and kept in the freezer until ready to serve. For prettiest slices, use a warm knife to cut through the pie.
- Prep Time: 15 minutes
- Cook Time: 240 minutes
- Category: Dessert
- Method: No-Bake
- Cuisine: American
Nutrition
- Serving Size: 1 slice
- Calories: 320
- Sugar: 20g
- Sodium: 150mg
- Fat: 20g
- Saturated Fat: 10g
- Unsaturated Fat: 5g
- Trans Fat: 0g
- Carbohydrates: 32g
- Fiber: 0g
- Protein: 4g
- Cholesterol: 50mg


